Batch processing in Photopea
Photopea can be used to do cropping, lens correction, color correction, among other tasks. You can record these actions on a single photo, and then repeat the actions on all photos in a folder automatically (batch processing).
Preparation
Ensure all the relevant photos are in the same folder.
Open the Photopea website.
Start recording an action
- Open one of the photos in Photopea (e.g., by dragging it from the file manager to the website).
- Go to the menu Window, Actions to open the Actions window.
- Click the New set button. Rename the new set (e.g.,
CAMBioMed Actions). - Click the New action button. Rename the new action in this set (e.g.,
Preprocess photoquadrats). - Click the Record button to start recording.
You can stop and resume recording the action at any time using the buttons at the bottom of the Actions window.

Perform actions
Now perform the actions to this photo that you want to repeat on other photos. See these pages for more information:
In contrast to Photoshop, it is not needed to perform a final Save action in Photopea.
Stop recording
- Press the Stop button in the Actions window to stop recording.
Apply to batch of photos
- Go to the menu File, Automate, Batch....
- Click Source Images and browse to the images to process.
- Under Action Set pick the set you created.
- Under Action pick the action you created.
-
Set the Format to
JPGand quality to80%or more.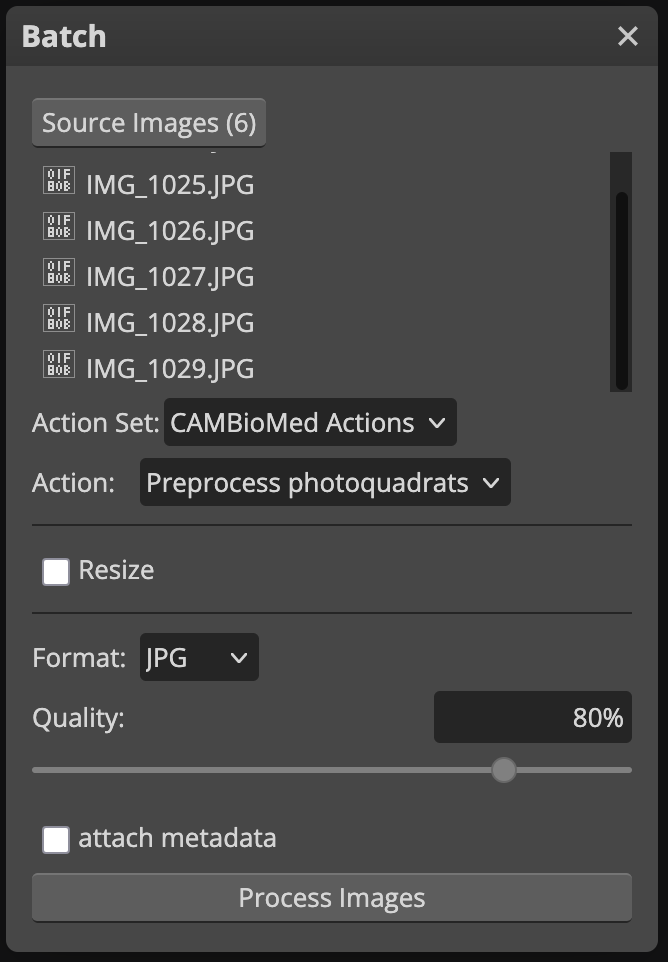 -
Click Process Images to start processing.
This may take a while, and you may not see progress until it is done. Photopea will fail to respond, and your browser might slow down.
- A ZIP archive with the processed images will be downloaded automatically.